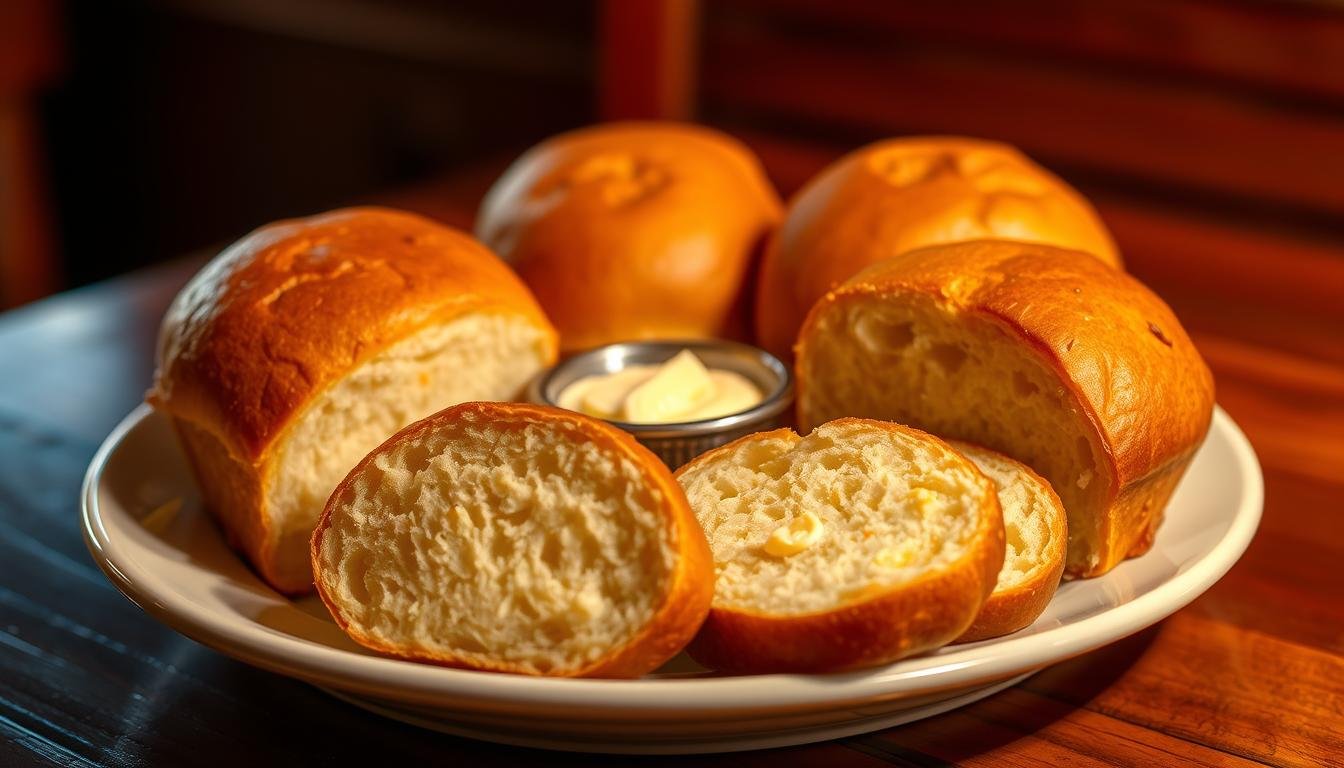
Longhorn Steakhouse Bread
We share a faithful copycat of the soft, heart-warming roll served at the restaurant. This version captures the warm crumb and buttery finish you expect from a classic roll, without needing advanced baking skills.
Our aim is to make this bread an easy addition to your weeknight menu. The loaf pairs well with pasta, salmon, sandwiches, and even southern stuffing. It also shines beside a family dinner when you want a simple, comforting side.
We give step-by-step guidance so home cooks can master the technique. This bread recipe and homemade bread approach use pantry staples and clear timing. Follow our recipe to bring the steakhouse experience to your table, and enjoy restaurant-quality results at home.
Why We Love This Copycat Bread
This copycat roll nails the same pillowy crumb and buttery finish we crave from the restaurant classic. It mimics the soft interior and thin, golden crust that make that free basket so hard to resist.
We designed the bread recipe to be simple and reliable. The steps are clear and use pantry staples, so anyone can bake fresh, warm rolls at home without fuss.
Fans praise the unmatched flavor and texture. Our version captures that profile, so you get the same satisfying bite beside pasta, salmon, or a weeknight roast.
- Soft, tender crumb with a light crust
- Easy, repeatable recipe for home bakers
- Versatile side that lifts many meals
In short, this copycat loaf gives us the restaurant feel at our table. We believe it ranks among the best sides for almost any dish we serve.
Essential Ingredients for Authentic Flavor
A few carefully chosen pantry staples define the rustic flavor and soft texture of this loaf. We focus on balancing whole grains, sweeteners, and dairy to recreate that familiar, comforting profile.
Whole Wheat Flour and Grains
We use 1 1/3 cups of whole wheat flour to give the loaf its nutty depth. Mixing that with 1 cup of all-purpose flour keeps the crumb light and tender.
Adding 1/4 cup of mixed grains, such as Bob’s Red Mill 10 Grain Cereal, gives texture and visual interest. The combo of whole wheat and all-purpose flour forms the sturdy but soft foundation for this recipe.

The Role of Honey and Buttermilk
We add 1/3 cup honey to introduce a subtle sweetness that rounds the flavor without overpowering it. Honey also helps with browning and keeps the crumb moist.
Warm 3/4 cup of buttermilk to about 110°F before combining. The mild acidity activates the yeast and creates a tender, open crumb. Finish the dry mix with 1 teaspoon of salt and 1/2 teaspoon of sugar to balance flavor.
| Ingredient | Amount |
|---|---|
| Whole wheat flour | 1 1/3 cups |
| All-purpose flour | 1 cup |
| Cup honey | 1/3 cup |
| Buttermilk (warmed) | 3/4 cup |
| Mixed grains | 1/4 cup |
| Salt / Sugar | 1 teaspoon / 1/2 teaspoon |
Preparing the Yeast and Dough
Begin by waking the yeast in warm buttermilk so the dough starts with a lively, foamy mixture.
Heat 3/4 cup of buttermilk to about 110°F, then stir in 2.5 teaspoons of yeast and a pinch of sugar. Let that mixture rest for 10 minutes until it becomes clearly foamy. This confirms the yeast is active and ready.
In a large bowl, whisk the dry ingredients: 1 1/3 cups whole wheat flour, 1 cup all-purpose flour, 1/2 teaspoon sugar, and 1 teaspoon salt. Keep the dry ingredients evenly mixed before adding liquids.
Pour the foamy yeast mixture into the bowl with the dry ingredients. Add the softened butter and 1/3 cup honey. Mix the dough for about two minutes to combine the fat and liquid into the flour.
Gradually add more flour only until the dough feels soft and slightly tacky. This step matters: slightly tacky dough rises better during development. Avoid adding excess flour; a little tack keeps the crumb tender.
- Proof time: 10 minutes — until foamy
- Initial mixing: ~2 minutes
- Final feel: soft, slightly tacky (not dry)
| Step | Key Measure | Expected Result |
|---|---|---|
| Warm buttermilk | 3/4 cup at 110°F | Gentle warmth for yeast activation |
| Proof yeast | 2.5 tsp yeast + pinch sugar | Foamy surface in ~10 minutes |
| Mix dry ingredients | Flour, sugar, salt in bowl | Evenly blended dry ingredients |
| Combine and adjust | Soften with butter, add honey | Soft, slightly tacky dough ready for kneading |
Kneading Techniques for Perfect Texture
How you knead the dough changes the crumb, so a few clear techniques go a long way.
Turn the dough onto a lightly floured surface and fold in the mixed grains. Knead by hand for 10-12 minutes until the mass feels smooth, elastic, and cohesive.
If you use a stand mixer, reduce that time to about 8-10 minutes on low speed with the dough hook. We find the Bosch Universal Plus and KitchenAid Artisan handle this recipe well.
Work until the gluten develops and the texture springs back when poked. Add only small pinches of flour if the dough starts to stick; excess dry flour will make the crumb tight.
| Method | Time (minutes) | Result |
|---|---|---|
| Hand kneading | 10–12 | Smooth, elastic dough with open crumb |
| Stand mixer | 8–10 | Even development with less effort |
| Tips | — | Add grains during knead; use small flour amounts only if sticky |
First Rise and Dough Development
The first rise is where the dough develops its texture and volume, so temperature and timing matter.
We transfer the kneaded dough to a lightly oiled bowl and coat the top with a thin film of oil to prevent a dry skin. Then we cover the bowl with plastic wrap or a damp towel to keep moisture in.
Place the bowl in a warm, draft-free spot and let the dough rise for 60–90 minutes, or until it has doubled in size. Using an oven with the light on, or a microwave with a cup of hot water inside, helps the rise stay even.
When the dough is soft and elastic after this time, it is ready for shaping. Proper dough rise at this stage creates the open crumb and volume we want in the final loaf.
- Time: 60–90 minutes
- Cover method: plastic wrap or damp towel
- Result: doubled size, soft, elastic texture
| Step | Environment | Expected Result |
|---|---|---|
| Initial rise | Warm, draft-free (oven light or microwave trick) | Dough doubles; soft and elastic |
| Cover | Plastic wrap or damp towel | Moist surface; no dry top |
| Check | After 60–90 minutes | Ready for shaping when doubled in size |
Shaping Your Homemade Loaves
After the dough has doubled, we gently punch it down in the bowl to release large bubbles. Then we divide the mass into two equal pieces for two loaves.

On a lightly floured surface, we shape each piece into a 7×5-inch rectangle. A dusting of flour prevents sticking without drying the dough.
Roll each rectangle tightly from the long side to form a loaf. Pinch the seams closed firmly so the loaf keeps its shape while baking.
- Handle dough gently to preserve air pockets and texture.
- Place loaves seam-side down on parchment for the second rise.
- Keep movements smooth and quick; excess handling wastes time and minutes.
| Specification | Measure | Why it matters |
|---|---|---|
| Loaf size | 7×5-inch | Uniform loaves bake evenly |
| Surface prep | Light flour dust | Prevents sticking without adding flour |
| Placement | Seam-side down on parchment | Preserves shape and top texture |
Second Rise and Scoring
Give the loaves a short, warm pause under a loose cover to complete their final dough rise. We place each shaped loaf seam-side down on the baking sheet and cover them loosely with plastic wrap. Let them rise until they have nearly doubled in size, about 30–45 minutes.
When the loaves look puffy and spring back slowly when touched, we score the top with a sharp knife. Make 3–4 shallow slits across each loaf. These cuts guide expansion and prevent the crust from bursting unevenly in the oven.
Scoring also helps the final appearance. A clean, even top gives the loaf the classic look that pairs well with many meals. Proper timing during this dough rise keeps the yeast active so the oven spring is lively.
- Place loaves seam-side down on parchment or a prepared sheet.
- Loosely cover with plastic wrap and let rise 30–45 minutes.
- Score 3–4 shallow slits across the top just before baking.
| Step | Action | Expected Result |
|---|---|---|
| Second rise | Cover with plastic wrap for 30–45 minutes | Loaf nearly doubled; puffy and springy |
| Scoring | 3–4 shallow slits with a sharp knife | Controlled expansion; even crust |
| Placement | Seam-side down on baking sheet | Smooth top and professional appearance |
Baking to Golden Perfection
Set your oven to 375°F (190°C) so the loaves meet the right heat the moment they go in. We always confirm the preheat oven temperature with a thermometer for consistent results.
Bake the bread for 25–35 minutes. We target an internal temperature of 190–200°F to ensure the crumb is fully set. Timing will vary by oven, so check the loaf at the lower end of the minutes range.
The bottom of a fully baked loaf sounds hollow when tapped. That tap test plus the internal temp gives us confidence the recipe is done. Let the loaves rest at least 10 minutes before slicing so the interior finishes setting.

For a glossy top, brush the hot loaves with an egg white and water mix after baking. The golden-brown color shows the crust has the right crunch and flavor.
| Step | Amount / Time | Why it matters |
|---|---|---|
| Preheat oven | 375°F (190°C) | Ensures even oven spring and browning |
| Bake | 25–35 minutes | Proper crumb development and crust |
| Finish | Rest 10 minutes | Interior sets for clean slices |
Proper Storage and Reheating Methods
Knowing how to freeze and reheat will let us enjoy this recipe across weeks, not just one meal.
For short-term storage, place the cooled homemade bread in a plastic bag or an airtight container. This keeps the crumb soft for 3–4 days and avoids drying.
Freezing for Long Term Use
To freeze, wrap the loaf tightly in plastic wrap, then add a layer of foil. Proper wrap prevents freezer burn and locks in moisture.
Store frozen loaves up to 3 months. Thaw at room temperature before reheating so the crumb warms evenly.
Best Ways to Reheat
We recommend a toaster oven on the warm setting to restore softness without overbaking. Reheat single slices or a whole loaf for a few minutes until warm.
- Avoid refrigeration—cold shortens shelf life and makes the crumb dry.
- Reheat just before serving, especially when pairing with a steakhouse dinner.
- If frozen solid, allow time to thaw at room temp before warming in the oven.
| Method | Time | Result |
|---|---|---|
| Plastic bag / airtight | 3–4 days | Soft, ready-to-slice |
| Plastic wrap + foil | Up to 3 months | Long-term freeze |
| Toaster oven (warm) | Few minutes | Restored softness |
Bringing the Steakhouse Experience Home
We hope this guide helps you recreate the iconic Longhorn Steakhouse Bread at home. Follow the steps for yeast proofing, gentle dough handling, and accurate oven timing to get consistent results.
Mastering this copycat bread recipe means you can enjoy a warm, golden loaf in minutes. Pay attention to the quality of your yeast and give the dough time to rise. Small details—like a measured cup of warm liquid or the bowl you use—make a big difference.
Share fresh loaves with family and friends alongside your favorite mains. Thank you for baking with us; we look forward to hearing how your golden-brown loaves turned out.